
What You Need:
- Tall Glass/Plastic Containers
- Skewers
- Clothespins
- Masking Tape
- Food Coloring
- Sugar (3 1/2 cups)
- Water (2 Cups)

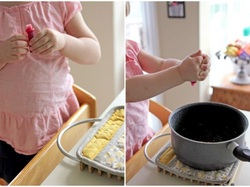
This is a 3-day project prep the night before by sprinkling sugar on the skewers after soaking them in water. Let them dry overnight. The next morning tear off strips of masking tape to go across each glass and then she poked holes in the middle of each tape strip to prep the spot for the skewer placement.
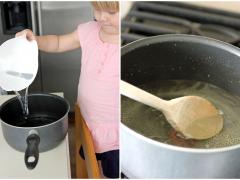
Then pour all the water into a pan. For this next step, a parent step, I boiled the water. Once boiling I added the sugar gradually, about a 1/2 cup at a time stirring constantly until dissolved. Once all the sugar was added, we let the sugar water boil for 10 minutes.
After 10 minutes of boiling we added our food coloring, about 4-5 drops of your desired color. Because the pan was very hot and just off the burner, explain the safety of standing back while dropping in the food coloring (if your child is not quite ready for this step, a parent should do it so as to not risk burning). Let the colored sugar mixture cool for another 10 minutes.
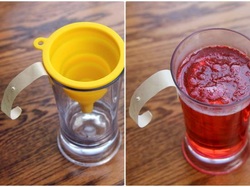
Pull back the masking tape and add the funnel to the glass. For this next step, is to pour in the colored sugar mixture, half of the mixture to each glass.

Place the sugar covered skewers down into the colored sugar water through the preset holes. Then clip on the clothespins to the skewer to keep them in the middle of the glasses, not touching the sides. It is important that the glasses sit untouched for at least two days to allow the sugar to "grow".

Here are rock candies growing on day 2, the left & on day 3, the right. We first started with taller fluted glasses letting them grow for 4 days. The width of the sugar sealed them to the fluted bottoms making them permanently attached to the bottom. On our second attempt we used the same fluted glasses but only let the candy grow for 2 days, thinking this would be the trick. It wasn't - for 2 days or 4 days there wasn't much growth difference & it still sealed the bottom permanently to the base of the candy stick. The above process became our third & final attempt using a non-fluted glass for only 2 days of growth, which turned out perfectly
The Science Behind It:
By heating the water and suger you've created a supersaturated solution. This solution is unstable and there is more solvte(sugar) than can stay in liquid form. Thus, the sugar wil come out of solution and form a precipitate. As the water evaporates, the solution becomes more saturated and sugar molecules will comtinue to come out of solution. As they do so, they will collet on the string. As the suger molecules accumulate on top of each other the product is your rock candy.
Source:http://www.kiwicrate.com/projects/Rock-Candy-Science-Experiment/2465
 RSS Feed